It has now officially been 3 days since I created this website. I figured, what could be more appropriate for a first blog post than a walkthrough of how I set it up? My plan for this post is to lay out a high level overview of each major step I’ve taken to install and configure the site so far. I’ll also go over which tools I used to accomplish each of these steps, why I chose them, and any alternatives that I considered. In summary, here is how I set up this website:
- Choose a domain name and registrar
- Choose a content management system
- Choose a hosting provider
- Install a WordPress theme
- Install WordPress plugins
- Establish an SFTP connection
- Edit CSS and PHP
- Set up Google Analytics, Tag Manager, and Search Console
- Decide on site architecture
- Set up a CDN
1. Choose a domain name and registrar
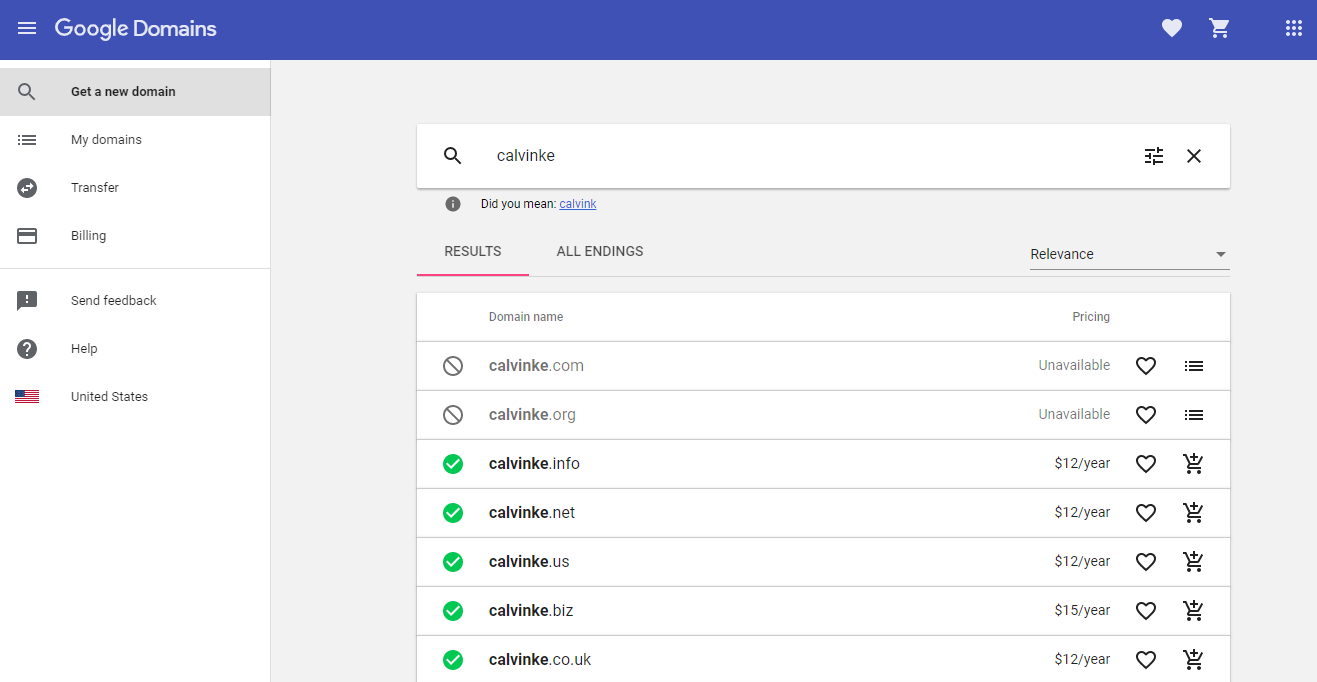
Choosing the right domain name isn’t always easy, but this time it was. Before I even decided to start this blog, I knew I wanted to at least purchase the domain name calvinke.com before some other Calvin Ke did, in case I ever decided to create a personal website. And lo and behold, that happened. I actually ended up purchasing two domains: calvinke.com and calvinke.org. I am using the former for this site while the latter simply redirects to it. It’s usually not a bad idea to buy up a couple of other TLDs for your domain name if possible; the primary benefit of this is to prevent other people from buying them and competing with your brand. I also considered buying calvin.ke since Ke is my last name, but apparently you must have a business with a physical presence in Kenya in order to register a domain with the .ke ccTLD. There was one domain auction site that claimed calvin.ke was available for purchase, but they seemed very shady so I decided against it.
Once I knew the domains I wanted to purchase, I turned to Google Domains to buy them. There are a ton of options out there for domain registrars you could go with, but I decided to go with Google for a few important reasons:
- Google Domains is more trustworthy than most other registrars.
- Google has way better data security than most other registrars.
- There are a couple of convenient perks that come with the Google ecosystem, such as immediate auto-confirmation of domain ownership when you set up Google Search Console.
That said, domain prices tend to be pretty comparable if not exactly equal between various domain registrars; as long as you don’t give your money to a total scam, it’s not a huge deal which registrar you choose. Many hosting providers will also offer you a free domain for the first year. Personally, I prefer having my domain registration decoupled from my web hosting provider, so I was happy to pay the extra $12 upfront to register with Google Domains. Alternatively, my next preferred registrar would be Namecheap.
2. Choose a content management system
WordPress is a CMS that I know and love (for the most part), so this was another pretty easy decision for me. Pretty much every major website I’ve worked on has used WordPress as its CMS solution, at least for part of the site. It’s easy to use and customize; there is a reason almost a third of all websites use WordPress. There is plenty of prior literature on the merits and demerits of WordPress so I’ll just leave it at that.
One intriguing alternative that I considered and that I am still interested in using at some point is Hugo, which is an open source site generator built with Go. It seems like an elegant, lightweight solution that is designed with speed in mind. Simo Ahava’s blog was built with Hugo and looks gorgeous in its Astralpeak theme. Frankly, I think it’s one of the most well made SEO blog sites from a technical SEO perspective; the fact that it was built on Hugo is a strong testimonial for that platform.
3. Choose a hosting provider
For WordPress, there is no shortage of viable hosting providers. Pantheon is one of the best platforms for enterprise sites, and probably your best bet if you have a big website that makes big dollars. Obviously, this site is not that, which means the hosting solutions I considered were more along the lines of Bluehost, SiteGround, HostGator, etc. I actually tried out a few different hosts for the very early iterations of calvinke.com, but ultimately settled on SiteGround.

Bluehost was the first one I tried, and it was actually a bit cheaper than SiteGround, but Bluehost’s cPanel felt janky and its UI just didn’t jive with me. I have to give them credit for being very quick and responsive when I called in to cancel, though. Another solution that I actually really liked was setting up a WordPress droplet on DigitalOcean. It’s a very dev-friendly platform that has robust solutions for scaling (not that I expect many people to visit this site). But the fact that it didn’t have a traditional cPanel eventually kind of got to me, even though there’s an in-browser console that you can use to configure a lot of things.
Ultimately, I chose SiteGround because it felt like a good compromise. I like the admin interface and its control panel is, in my opinion, by far the most intuitive out of the hosting solutions I tried. That’s not to say SiteGround is perfect, but it’s more than adequate for a personal blog like this one.
4. Install a WordPress theme
Eventually I would like to create my own theme from scratch, but my CSS skills are not quite there yet. For now, I just chose a premade theme so I could stand up the site quickly. It’s fun to browse through WordPress’s library of themes, but I actually didn’t spend too long on this decision. I saw a few themes that I liked, and ended up going with Mesmerize. It had a nice aesthetic and seemed like a fairly popular theme so I knew there would be a decent amount of support documentation for it.
When choosing a theme, there is always the trade-off between aesthetics and code bloat. That’s not to say that having a nice-looking theme and clean code are mutually exclusive, but some of the design elements of popular WordPress themes definitely come with additional lines of code. Mesmerize’s main stylesheet is over 10,000 lines before minification (bruh), and it only got longer after I edited and added even more CSS to put some personal touches on it.
One thing I should have done immediately after installing the theme was to make a child theme and use that theme to apply all of my CSS edits. One reason why it’s important to use a child theme is so that any changes you make to the theme are preserved and not overwritten when the theme’s developer updates the theme. Unfortunately I had a total mental lapse and forgot to do this until I’d already made too many changes in the parent theme. Because I’m lazy, I ended up using kind of a janky workaround to cover for my earlier lapse: I edited the version number in the theme’s style.css declaration to a really high number so that it would be untouched by updates.
5. Install WordPress plugins
Hoo boy, the world of plugins can quickly become a minefield of decisions. In general, it is a good idea to minimize the number of plugins you are using, and use plugins that are coded lean and run fast. (Thanks, Captain Obvious.) I also generally prefer to avoid plugins if they are doing something relatively simple that I can just take care of myself by editing my PHP, CSS, etc. On the other hand, plugins are super useful for things that I am either too scrubby and/or too lazy to solve manually. Currently, I have 6 active plugins:
- Classic Editor – This was the first plugin I installed. I dislike the Gutenberg block editor and have some bones to pick about how Gutenberg was released in general, but that is a story for another time.
- HTML Editor Syntax Highlighter – I usually just edit my posts in HTML in Sublime Text and paste it back into WordPress when I’m done, but it’s nice to have this when I decide to edit content inside WP.
- Yoast SEO – A tried and true solution, even if the size of the plugin is slightly larger than I would like. Could I just create advanced custom fields to take care of most of this stuff? Probably. Am I too lazy to do that right now? Definitely.
- Redirection – Although I could write redirects directly to the .htaccess file without this plugin, it is pretty handy.
- Edit Author Slug – Pretty self-explanatory.
- Autoptimize – I’m using this to minify some code. I have not used this plugin before, so we’ll see how it goes.
- Smush Image Compression – Again, pretty self-explanatory. I’m using this both as a compression and lazy loading solution.
- Advanced Custom Fields – I haven’t actually made any ACFs on this WP install yet, but chances are I will want to at some point.
Of course, these are just the plugins I started with. It is highly likely I will continue to add and remove plugins down the line, as with any WordPress install.
One plugin I immediately uninstalled was the “SG Optimizer” (heavy on the airquotes around the second word there) that was pre-installed by SiteGround. I strongly recommend anyone using SiteGround to do the same. This was such a bloated plugin that made WP Admin exceedingly slow to navigate around. The problem with the SG Optimizer plugin is that it tries to do too much; it follows the Jetpack school of thought of cramming a trillion things into one plugin when most users will only ever touch a small fraction of those features. I cannot emphasize enough what a mistake it is for a plugin to try to do too much. The Pareto principle is a real thing, and modularity is a virtue.
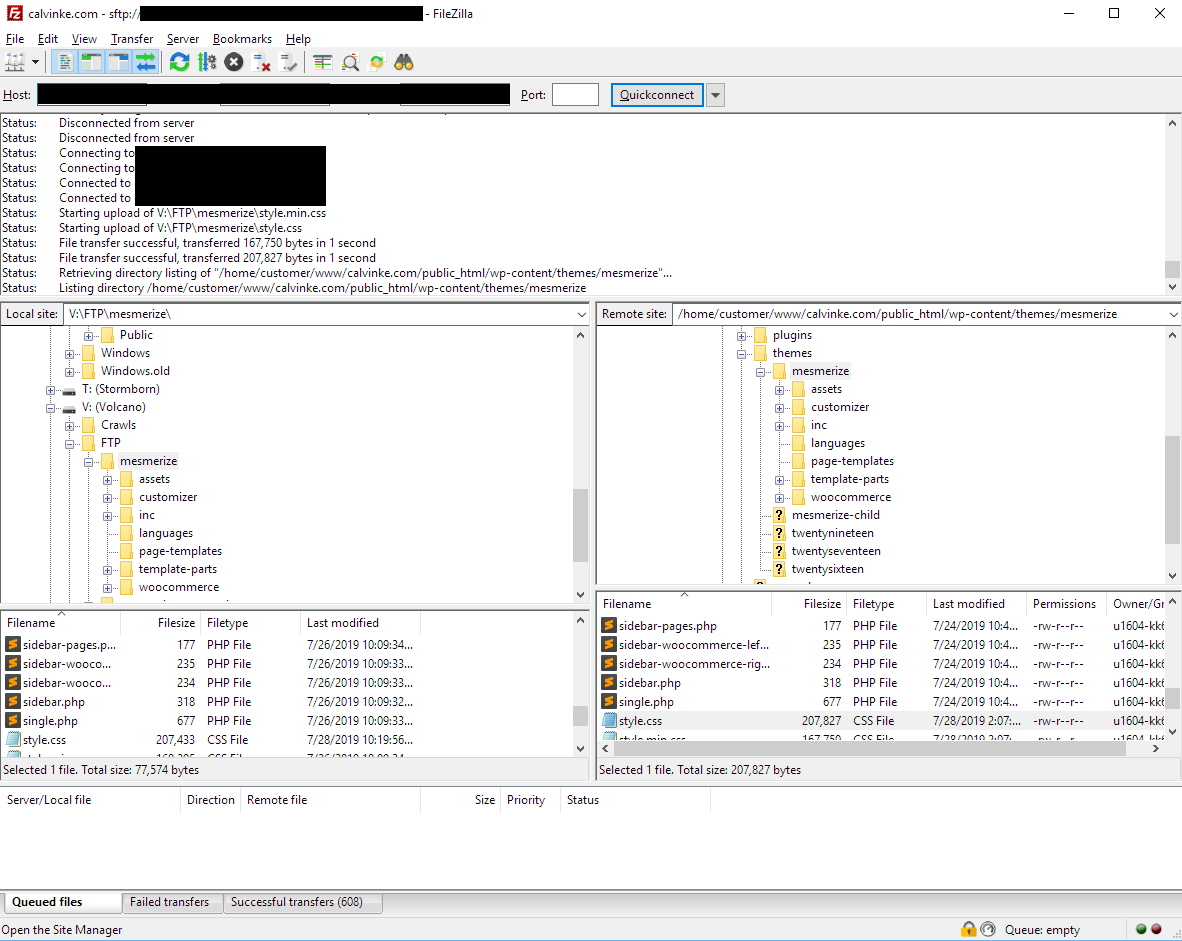
6. Establish an SFTP connection
So this isn’t entirely necessary because there’s actually an easy alternative that is immediately available for use: the File Manager within the “Site” section of SiteGround’s control panel. It’s a pretty simple and intuitive GUI that lets you access and edit your site’s files directly from your browser.
However, as I’ve mentioned, I prefer to edit files within Sublime Text. By establishing a secure FTP connection between SiteGround and my own PC, I can simply open the website’s file repository as a project within Sublime for easy editing. SiteGround actually makes it really easy to set up SSH keys and establish an SFTP connection. (Again, it speaks to the ease of use of their cPanel.) This can be done through the SSH Keys Manger option under the “Devs” section of the control panel. Once I set up an SSH key, I simply created a new SFTP connection through the FileZilla client. And boom, I’m now able to easily make edits to files on my hard drive and upload them back to the server via FileZilla:
7. Edit CSS and PHP
Now that I could upload files back to SiteGround straight from SFTP, I began making various CSS and PHP edits. Keep in mind that I’m not exactly a super skilled or experienced coder in either of these, but there were some things that I wanted to do right away:
- Increase the menu item font size on both desktop and mobile
- Introduce a smooth scrolling animation
- Make the fixed menu header not block anchors upon scrolling
- Add the last modified date to post bylines
8. Set up Google Analytics, Tag Manager, and Search Console
As I mentioned earlier, using Google Domains made it easy to set up Search Console right away. By simply logging in with the same email that I used for Google Domains, I was able to bypass the traditional verification requirements for Google Search Console. I then used the same email to sign up for a Google Analytics and Google Tag Manager account. I decided to drop the GA tracking code through GTM since I figured I would be using GTM for other stuff anyway and it didn’t make sense to have both of those code snippets floating around the <head> separately. So I grabbed the gtag.js code out of GA’s Admin/Tracking Info/Tracking Code menu and created a tag for it in GTM with a simple Page View trigger attached to it. I then grabbed the GTM code snippet and pasted it into the Mesmerize theme’s header.php and header-homepage.php files.
9. Decide on site architecture
There are a few decisions to unpack here.
The first was whether I wanted a static homepage and separate blog page or merely use the homepage as the blog feed. While I would probably choose the former for a business site, I chose the latter for my personal blog. At the end of the day, there wasn’t a ton of unique static content I would put on my homepage in lieu of the blog feed, so it didn’t make sense for me to separate it.
The next decision was on URL structure. Namely, whether I wanted a completely flat structure with everything directly off the root, or some amount of subdirectories. Now, with a small site like this, it is almost always fine and arguably even ideal to go with that perfectly flat structure. However, I decided to basically partition the site into an /seo/ section and a /random/ section, to silo the blog posts in those respective topics. With the homepage serving as a blog feed and a side nav with links to each category, it’s not as if doing this has suddenly introduced a ton of additional click depth for crawlers. Setting up these subfolders was probably still unnecessary, but at this point it was pretty much a “why the hell not” decision.
With that in mind, I navigated to WordPress’s Permalink settings and pasted /%category%/%postname%/ in the “custom structure” field, then created the respective post categories for SEO and Random. Of course, you could download plugins (or edit PHP on your own) to allow for customizing each individual page’s and post’s URL slug on a case-by-case basis, but this structure works fine for me. Almost every post I make will fall into one of these two categories, and I don’t foresee the need to create many new categories in the future.
10. Set up a CDN
A content delivery network (CDN) is pretty much a requirement for any site with large traffic. It is probably unnecessary for a site so small, but hey, why the hell not. A CDN helps to distribute the load from the origin server where your website is hosted, instead serving up cached versions of the site from edge servers. In each case when a user’s browser client sends a request to your site, the web page that is served to them generally comes from the edge that is geographically closest to them. Having these edge servers also helps to mask your origin server’s IP address, making it less vulnerable (but not completely immune) to DDoS attacks. Anyway, there’s a ton of literature on CDNs out there that explains it much better than I am able to.
Essentially, I’m trying to take advantage of a CDN’s ability to cache static assets and serve them up to users from the edge closest to them. The CDN I chose to use was Cloudflare; it was a pretty easy choice as it’s free, easy to set up, and works well (at least in my experience).
Final Thoughts
It’s been a fun weekend standing up this site in between running errands, hiking, and binge watching Stranger Things. Although this site may never grow into a large traffic getter, that isn’t really the goal of this site in the first place. The goal is for me to have a sandbox to play around with different things as well as a place to document my rambling thoughts, whether they be SEO-related or just random nonsense. Hopefully I can look back at this humble blog one day as a more competent web developer and think “Wow, I can’t believe I was such a scrub back then.”
Do you agree or disagree with the decisions I made and the tools I used? Did I get anything wrong? Feel free to leave a comment and let me know.